General assignment classrooms
Overview
This document provides tips for recording in-person class sessions and presenting remotely via Zoom from a classroom (e.g., for a hybrid in-person + remote class session)
This document assumes that instructors want to record “board work” (which might not be an actual board) as well as computer presentations/demos. If not, then simply joining the Zoom meeting from your laptop and using screen sharing should suffice (or signing up for Course Capture for recordings for asynchronous viewing).
There are two basic categories of recording with cameras for board work.
- Many general assignment (GA) campus classrooms are equipped with recording equipment that can capture board work and audio. These rooms are noted as having “Feature: Video Conference Capable” or “Feature: Camera without Operator” in ETS's classroom database. Rooms without these features can only record the screen and in-room lapel mic via Course Capture (or the screen and laptop mic when recording via Zoom).
- (DIY) In the remaining campus rooms and in the Stat department 3rd floor rooms, cameras are not available and other approaches are needed, as discussed below.
More details on each option are discussed next.
GA classrooms
Course capture (asynchronous)
You can opt to have course capture enabled for your class (instructors should receive an email about this before the semester starts). In this case, your presentation (including the board via in the in-room camera and projector) should be recorded and made available automatically in the Course Capture section of bCourses. Make sure you point the camera as desired using the camera control buttons on the in-room touchscreen. You can choose to focus the camera on one of the boards if you wish. Also make sure to use the in-room lapel mic.
Zoom recording (synchronous and asynchronous)
Alternatively, you can present remotely (and also record) via Zoom (or other video conferencing tools such as Google Meet). These rooms are set up such that one can use the in-room camera and audio in the Zoom meeting, rather than your laptop's webcam and mic. You will need to:
- Start the meeting and make sure it is being recorded.
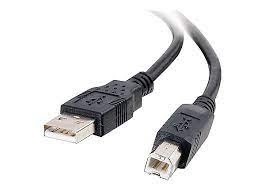
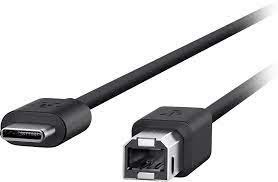
- Connect your laptop to the AV equipment in the room (which may be labelled “PA out”). You will need to bring a USB cable to connect to the in-room equipment. Most older laptops will need a USB-A to USB-B cable, and many newer laptops will need a USB-C to USB-B cable. Statistics affiliates can usually check out cables and related dongles from the Statistics main office, but consult the SCF in case of problems.
 |
 |
|---|
- Make sure that the room camera, mic, and speakers are selected as the camera, mic, and speakers to be used by Zoom by selecting “ExtronMediaPort” (this might be named something different in some rooms) after clicking the caret symbols next to the camera and microphone buttons in the bottom left of the Zoom meeting screen.
- If you have a newer MacBook that requires use of a port for charging and only has two ports, note that connecting to the projector and connecting for the Zoom room functionality require two ports, so if you need to charge while teaching you will need some sort of device that serves to expand the number of ports. The SCF can help with this.
As with Course Capture, you can choose to focus the camera on one of the boards if you wish, and you should make sure to use the in-room lapel mic. While presenting, make sure to turn screen sharing on and off as appropriate to control what the remote/recording viewers see.
Based on an initial test, we believe that when using the in-room lapel mic that students in the room and those viewing the recordings or joining remotely will be able to hear the instructor fine.
See the ETS help video for more details on controlling the camera, mic, and using Zoom with the room technology.
DIY (Do-It-Yourself) Capture
The options for DIY capture include the following. All assume you are using Zoom or Google Meet to record your lecture.
- Use a tablet (e.g., an iPad) or document camera so that your "board work" is routed through the computer and captured by sharing the relevant screen with your Zoom meeting. In-person students will see the board work on the projector screen.
- Use your phone to capture the (actual) board by having the phone join the meeting as another participant, with the phone in an SCF-provided holder/tripod.
- As you move from your laptop to the board, Zoom will automatically switch the view from the laptop to the phone to capture the board work. Zoom does this by detecting where the audio input is louder.
- You will probably need to stop screen sharing when you move to the board.
- You could also have the “presenter” always be the phone, but for reasonable audio quality, you may want to be careful you are not too far from the phone in that case.
- Positioning the phone closer to the board and using a blackboard rather than a whiteboard may result in higher/sufficient quality.
- Use an SCF-provided external Logitech camera (which can be attached to an SCF-provided tripod) or other loaner camera from the SCF or ETS to capture the (actual) board.